前言
Java 反编译,一听可能觉得高深莫测,其实反编译并不是什么特别高级的操作,Java 对于 Class 字节码文件的生成有着严格的要求,如果你非常熟悉 Java 虚拟机规范,了解 Class 字节码文件中一些字节的作用,那么理解反编译的原理并不是什么问题。
甚至像下面这样的 Class 文件你都能看懂一二。
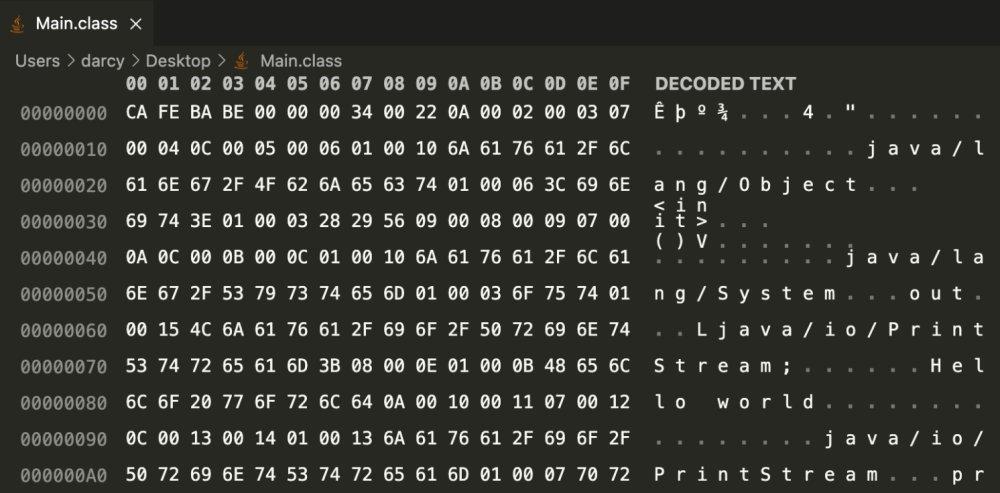
一般在逆向研究和代码分析中,反编译用到的比较多。不过在日常开发中,有时候只是简单的看一下所用依赖类的反编译,也是十分重要的。
恰好最近工作中也需要用到 Java 反编译,所以这篇文章介绍目前常见的的几种 Java 反编译工具的使用,在文章的最后也会通过编译速度、语法支持以及代码可读性三个维度,对它们进行测试,分析几款工具的优缺点。
Procyon
Github 链接:https://github.com/mstrobel/procyon
Procyon 不仅仅是反编译工具,它其实是专注于 Java 代码的生成和分析的一整套的 Java 元编程工具。
主要包括下面几个部分:
Core Framework
Reflection Framework
Expressions Framework
Compiler Toolset (Experimental)
Java Decompiler (Experimental)
可以看到反编译只是 Procyon 的其中一个模块,Procyon 原来托管于 bitbucket,后来迁移到了 GitHub,根据 GitHub 的提交记录来看,也有将近两年没有更新了。不过也有依赖 Procyon 的其他的开源反编译工具如** decompiler-procyon**,更新频率还是很高的,下面也会选择这个工具进行反编译测试。
使用 Procyon
<!-- https://mvnrepository.com/artifact/org.jboss.windup.decompiler/decompiler-procyon -->
<dependency>
    <groupId>org.jboss.windup.decompiler</groupId>
    <artifactId>decompiler-procyon</artifactId>
    <version>5.1.4.Final</version>
</dependency>
写一个简单的反编译测试。
package com.wdbyte.decompiler;

import java.io.IOException;
import java.nio.file.Path;
import java.nio.file.Paths;
import java.util.Iterator;
import java.util.List;

import org.jboss.windup.decompiler.api.DecompilationFailure;
import org.jboss.windup.decompiler.api.DecompilationListener;
import org.jboss.windup.decompiler.api.DecompilationResult;
import org.jboss.windup.decompiler.api.Decompiler;
import org.jboss.windup.decompiler.procyon.ProcyonDecompiler;

/**
 * Procyon 反编译测试
 *
 *  @author https://github.com/niumoo
 * @date 2021/05/15
 */
public class ProcyonTest {
    public static void main(String[] args) throws IOException {
        Long time = procyon("decompiler.jar", "procyon_output_jar");
        System.out.println(String.format("decompiler time: %dms", time));
    }
    public static Long procyon(String source,String targetPath) throws IOException {
        long start = System.currentTimeMillis();
        Path outDir = Paths.get(targetPath);
        Path archive = Paths.get(source);
        Decompiler dec = new ProcyonDecompiler();
        DecompilationResult res = dec.decompileArchive(archive, outDir, new DecompilationListener() {
            public void decompilationProcessComplete() {
                System.out.println("decompilationProcessComplete");
            }
            public void decompilationFailed(List<String> inputPath, String message) {
                System.out.println("decompilationFailed");
            }
            public void fileDecompiled(List<String> inputPath, String outputPath) {
            }
            public boolean isCancelled() {
                return false;
            }
        });

        if (!res.getFailures().isEmpty()) {
            StringBuilder sb = new StringBuilder();
            sb.append("Failed decompilation of " + res.getFailures().size() + " classes: ");
            Iterator failureIterator = res.getFailures().iterator();
            while (failureIterator.hasNext()) {
                DecompilationFailure dex = (DecompilationFailure)failureIterator.next();
                sb.append(System.lineSeparator() + "    ").append(dex.getMessage());
            }
            System.out.println(sb.toString());
        }
        System.out.println("Compilation results: " + res.getDecompiledFiles().size() + " succeeded, " + res.getFailures().size() + " failed.");
        dec.close();
        Long end = System.currentTimeMillis();
        return end - start;
    }
}
Procyon 在反编译时会实时输出反编译文件数量的进度情况,最后还会统计反编译成功和失败的 Class 文件数量。
....
五月 15, 2021 10:58:28 下午 org.jboss.windup.decompiler.procyon.ProcyonDecompiler$3 call
信息: Decompiling 650 / 783
五月 15, 2021 10:58:30 下午 org.jboss.windup.decompiler.procyon.ProcyonDecompiler$3 call
信息: Decompiling 700 / 783
五月 15, 2021 10:58:37 下午 org.jboss.windup.decompiler.procyon.ProcyonDecompiler$3 call
信息: Decompiling 750 / 783
decompilationProcessComplete
Compilation results: 783 succeeded, 0 failed.
decompiler time: 40599ms
Procyon GUI
对于 Procyon 反编译来说,在 GitHub 上也有基于此实现的开源 GUI 界面,感兴趣的可以下载尝试。
Github 地址:https://github.com/deathmarine/Luyten
CFR
GitHub 地址:https://github.com/leibnitz27/cfr
CFR 官方网站:http://www.benf.org/other/cfr/(可能需要FQ)
Maven 仓库: https://mvnrepository.com/artifact/org.benf/cfr
CFR(Class File Reader) 可以支持 Java 9、Java 12、Java 14 以及其他的最新版 Java 代码的反编译工作。而且 CFR 本身的代码是由 Java 6 编写,所以基本可以使用 CFR 在任何版本的 Java 程序中。值得一提的是,使用 CFR 甚至可以将使用其他语言编写的的 JVM 类文件反编译回 Java 文件。
CFR 命令行使用
使用 CFR 反编译时,你可以下载已经发布的 JAR 包,进行命令行反编译,也可以使用 Maven 引入的方式,在代码中使用。下面先说命令行运行的方式。
直接在 GitHub Tags 下载已发布的最新版 JAR. 可以直接运行查看帮助。
# 查看帮助
java -jar cfr-0.151.jar --help
如果只是反编译某个 class.
# 反编译 class 文件,结果输出到控制台
java -jar cfr-0.151.jar WindupClasspathTypeLoader.class
# 反编译 class 文件,结果输出到 out 文件夹
java -jar cfr-0.151.jar WindupClasspathTypeLoader.class --outputpath ./out
反编译某个 JAR.
# 反编译 jar 文件,结果输出到 output_jar 文件夹
➜  Desktop java -jar cfr-0.151.jar decompiler.jar --outputdir ./output_jar
Processing decompiler.jar (use silent to silence)
Processing com.strobel.assembler.metadata.ArrayTypeLoader
Processing com.strobel.assembler.metadata.ParameterDefinition
Processing com.strobel.assembler.metadata.MethodHandle
Processing com.strobel.assembler.metadata.signatures.FloatSignature
.....
反编译结果会按照 class 的包路径写入到指定文件夹中。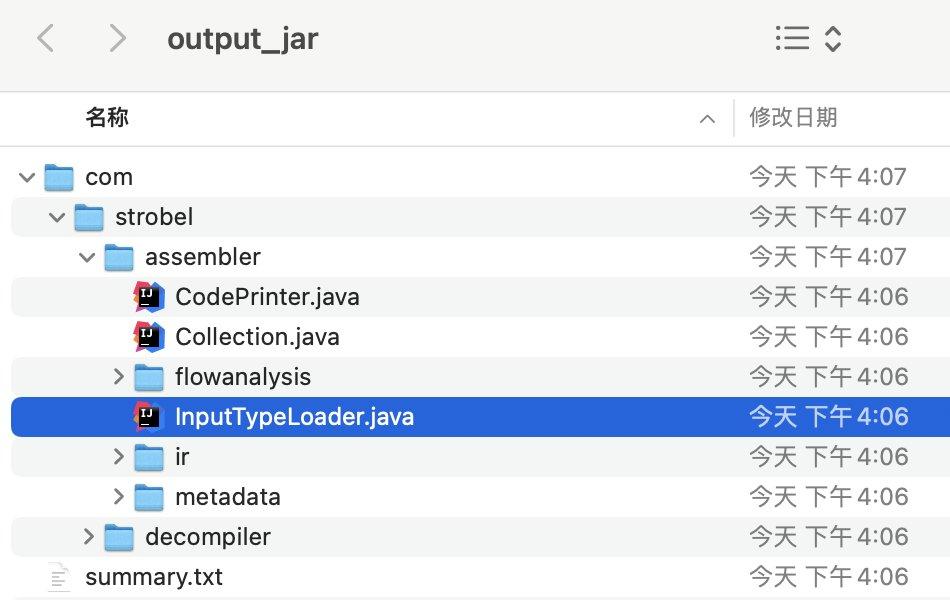
CFR 代码中使用
添加依赖这里不提。
<!-- https://mvnrepository.com/artifact/org.benf/cfr -->
<dependency>
    <groupId>org.benf</groupId>
    <artifactId>cfr</artifactId>
    <version>0.151</version>
</dependency>
实际上我在官方网站和 GitHub 上都没有看到具体的单元测试示例。不过没有关系,既然能在命令行运行,那么直接在 IDEA 中查看反编译后的 Main 方法入口,看下命令行是怎么执行的,就可以写出自己的单元测试了。
package com.wdbyte.decompiler;

import java.io.IOException;
import java.util.ArrayList;
import java.util.HashMap;
import java.util.List;

import org.benf.cfr.reader.api.CfrDriver;
import org.benf.cfr.reader.util.getopt.OptionsImpl;

/**
 * CFR Test
 *
 * @author https://github.com/niumoo
 * @date 2021/05/15
 */
public class CFRTest {
    public static void main(String[] args) throws IOException {
        Long time = cfr("decompiler.jar", "./cfr_output_jar");
        System.out.println(String.format("decompiler time: %dms", time));
        // decompiler time: 11655ms
    }
    public static Long cfr(String source, String targetPath) throws IOException {
        Long start = System.currentTimeMillis();
        // source jar
        List<String> files = new ArrayList<>();
        files.add(source);
        // target dir
        HashMap<String, String> outputMap = new HashMap<>();
        outputMap.put("outputdir", targetPath);

        OptionsImpl options = new OptionsImpl(outputMap);
        CfrDriver cfrDriver = new CfrDriver.Builder().withBuiltOptions(options).build();
        cfrDriver.analyse(files);
        Long end = System.currentTimeMillis();
        return (end - start);
    }
}
JD-Core
GiHub 地址:https://github.com/java-decompiler/jd-core
JD-core 官方网址:https://java-decompiler.github.io/
JD-core 是一个的独立的 Java 库,可以用于 Java 的反编译,支持从 Java 1 至 Java 12 的字节码反编译,包括 Lambda 表达式、方式引用、默认方法等。知名的 JD-GUI 和 Eclipse 无缝集成反编译引擎就是 JD-core。
JD-core 提供了一些反编译的核心功能,也提供了单独的 Class 反编译方法,但是如果你想在自己的代码中去直接反编译整个 JAR 包,还是需要一些改造的,如果是代码中有匿名函数,Lambda 等,虽然可以直接反编译,不过也需要额外考虑。
使用 JD-core
        <!-- https://mvnrepository.com/artifact/org.jd/jd-core -->
        <dependency>
            <groupId>org.jd</groupId>
            <artifactId>jd-core</artifactId>
            <version>1.1.3</version>
        </dependency>
为了可以反编译整个 JAR 包,使用的代码我做了一些简单改造,以便于最后一部分的对比测试,但是这个示例中没有考虑内部类,Lambda 等会编译出多个 Class 文件的情况,所以不能直接使用在生产中。
package com.wdbyte.decompiler;

import java.io.File;
import java.io.IOException;
import java.io.InputStream;
import java.nio.file.Files;
import java.nio.file.Path;
import java.nio.file.Paths;
import java.util.Enumeration;
import java.util.HashMap;
import java.util.jar.JarFile;
import java.util.zip.ZipEntry;
import java.util.zip.ZipFile;

import org.apache.commons.io.IOUtils;
import org.apache.commons.lang3.StringUtils;
import org.jd.core.v1.ClassFileToJavaSourceDecompiler;
import org.jd.core.v1.api.loader.Loader;
import org.jd.core.v1.api.printer.Printer;

/**
 * @author https://github.com/niumoo
 * @date 2021/05/15
 */
public class JDCoreTest {

    public static void main(String[] args) throws Exception {
        JDCoreDecompiler jdCoreDecompiler = new JDCoreDecompiler();
        Long time = jdCoreDecompiler.decompiler("decompiler.jar","jd_output_jar");
        System.out.println(String.format("decompiler time: %dms", time));
    }
}


class JDCoreDecompiler{

    private ClassFileToJavaSourceDecompiler decompiler = new ClassFileToJavaSourceDecompiler();
    // 存放字节码
    private HashMap<String,byte[]> classByteMap = new HashMap<>();

    /**
     * 注意:没有考虑一个 Java 类编译出多个 Class 文件的情况。
     *
     * @param source
     * @param target
     * @return
     * @throws Exception
     */
    public Long decompiler(String source,String target) throws Exception {
        long start = System.currentTimeMillis();
        // 解压
        archive(source);
        for (String className : classByteMap.keySet()) {
            String path = StringUtils.substringBeforeLast(className, "/");
            String name = StringUtils.substringAfterLast(className, "/");
            if (StringUtils.contains(name, "$")) {
                name = StringUtils.substringAfterLast(name, "$");
            }
            name = StringUtils.replace(name, ".class", ".java");
            decompiler.decompile(loader, printer, className);
            String context = printer.toString();
            Path targetPath = Paths.get(target + "/" + path + "/" + name);
            if (!Files.exists(Paths.get(target + "/" + path))) {
                Files.createDirectories(Paths.get(target + "/" + path));
            }
            Files.deleteIfExists(targetPath);
            Files.createFile(targetPath);
            Files.write(targetPath, context.getBytes());
        }
        return System.currentTimeMillis() - start;
    }
    private void archive(String path) throws IOException {
        try (ZipFile archive = new JarFile(new File(path))) {
            Enumeration<? extends ZipEntry> entries = archive.entries();
            while (entries.hasMoreElements()) {
                ZipEntry entry = entries.nextElement();
                if (!entry.isDirectory()) {
                    String name = entry.getName();
                    if (name.endsWith(".class")) {
                        byte[] bytes = null;
                        try (InputStream stream = archive.getInputStream(entry)) {
                            bytes = IOUtils.toByteArray(stream);
                        }
                        classByteMap.put(name, bytes);
                    }
                }
            }
        }
    }

    private Loader loader = new Loader() {
        @Override
        public byte[] load(String internalName) {
            return classByteMap.get(internalName);
        }
        @Override
        public boolean canLoad(String internalName) {
            return classByteMap.containsKey(internalName);
        }
    };

    private Printer printer = new Printer() {
        protected static final String TAB = "  ";
        protected static final String NEWLINE = "\n";
        protected int indentationCount = 0;
        protected StringBuilder sb = new StringBuilder();
        @Override public String toString() {
            String toString = sb.toString();
            sb = new StringBuilder();
            return toString;
        }
        @Override public void start(int maxLineNumber, int majorVersion, int minorVersion) {}
        @Override public void end() {}
        @Override public void printText(String text) { sb.append(text); }
        @Override public void printNumericConstant(String constant) { sb.append(constant); }
        @Override public void printStringConstant(String constant, String ownerInternalName) { sb.append(constant); }
        @Override public void printKeyword(String keyword) { sb.append(keyword); }
        @Override public void printDeclaration(int type, String internalTypeName, String name, String descriptor) { sb.append(name); }
        @Override public void printReference(int type, String internalTypeName, String name, String descriptor, String ownerInternalName) { sb.append(name); }
        @Override public void indent() { this.indentationCount++; }
        @Override public void unindent() { this.indentationCount--; }
        @Override public void startLine(int lineNumber) { for (int i=0; i<indentationCount; i++) sb.append(TAB); }
        @Override public void endLine() { sb.append(NEWLINE); }
        @Override public void extraLine(int count) { while (count-- > 0) sb.append(NEWLINE); }
        @Override public void startMarker(int type) {}
        @Override public void endMarker(int type) {}
    };
}
JD-GUI
GitHub 地址:https://github.com/java-decompiler/jd-gui
JD-core 也提供了官方的 GUI 界面,需要的也可以直接下载尝试。
Jadx
GitHub 地址:https://github.com/skylot/jadx
Jadx 是一款可以反编译 JAR、APK、DEX、AAR、AAB、ZIP 文件的反编译工具,并且也配有 Jadx-gui 用于界面操作。
Jadx 使用 Grade 进行依赖管理,可以自行克隆仓库打包运行。
git clone https://github.com/skylot/jadx.git
cd jadx
./gradlew dist
# 查看帮助
 ./build/jadx/bin/jadx --help

jadx - dex to java decompiler, version: dev

usage: jadx [options] <input files> (.apk, .dex, .jar, .class, .smali, .zip, .aar, .arsc, .aab)
options:
  -d, --output-dir                    - output directory
  -ds, --output-dir-src               - output directory for sources
  -dr, --output-dir-res               - output directory for resources
  -r, --no-res                        - do not decode resources
  -s, --no-src                        - do not decompile source code
  --single-class                      - decompile a single class
  --output-format                     - can be 'java' or 'json', default: java
  -e, --export-gradle                 - save as android gradle project
  -j, --threads-count                 - processing threads count, default: 6
  --show-bad-code                     - show inconsistent code (incorrectly decompiled)
  --no-imports                        - disable use of imports, always write entire package name
  --no-debug-info                     - disable debug info
  --add-debug-lines                   - add comments with debug line numbers if available
  --no-inline-anonymous               - disable anonymous classes inline
  --no-replace-consts                 - don't replace constant value with matching constant field
  --escape-unicode                    - escape non latin characters in strings (with \u)
  --respect-bytecode-access-modifiers - don't change original access modifiers
  --deobf                             - activate deobfuscation
  --deobf-min                         - min length of name, renamed if shorter, default: 3
  --deobf-max                         - max length of name, renamed if longer, default: 64
  --deobf-cfg-file                    - deobfuscation map file, default: same dir and name as input file with '.jobf' extension
  --deobf-rewrite-cfg                 - force to save deobfuscation map
  --deobf-use-sourcename              - use source file name as class name alias
  --deobf-parse-kotlin-metadata       - parse kotlin metadata to class and package names
  --rename-flags                      - what to rename, comma-separated, 'case' for system case sensitivity, 'valid' for java identifiers, 'printable' characters, 'none' or 'all' (default)
  --fs-case-sensitive                 - treat filesystem as case sensitive, false by default
  --cfg                               - save methods control flow graph to dot file
  --raw-cfg                           - save methods control flow graph (use raw instructions)
  -f, --fallback                      - make simple dump (using goto instead of 'if', 'for', etc)
  -v, --verbose                       - verbose output (set --log-level to DEBUG)
  -q, --quiet                         - turn off output (set --log-level to QUIET)
  --log-level                         - set log level, values: QUIET, PROGRESS, ERROR, WARN, INFO, DEBUG, default: PROGRESS
  --version                           - print jadx version
  -h, --help                          - print this help
Example:
  jadx -d out classes.dex
根据 HELP 信息,如果想要反编译 decompiler.jar 到 out 文件夹。
./build/jadx/bin/jadx -d ./out ~/Desktop/decompiler.jar
INFO  - loading ...
INFO  - processing ...
INFO  - doneress: 1143 of 1217 (93%)
Fernflower
GitHub 地址:https://github.com/fesh0r/fernflower
Fernflower 和 Jadx 一样使用 Grade 进行依赖管理,可以自行克隆仓库打包运行。
➜  fernflower-master ./gradlew build

BUILD SUCCESSFUL in 32s
4 actionable tasks: 4 executed

➜  fernflower-master java -jar build/libs/fernflower.jar
Usage: java -jar fernflower.jar [-<option>=<value>]* [<source>]+ <destination>
Example: java -jar fernflower.jar -dgs=true c:\my\source\ c:\my.jar d:\decompiled\

➜  fernflower-master mkdir out
➜  fernflower-master java -jar build/libs/fernflower.jar ~/Desktop/decompiler.jar ./out
INFO:  Decompiling class com/strobel/assembler/metadata/ArrayTypeLoader
INFO:  ... done
INFO:  Decompiling class com/strobel/assembler/metadata/ParameterDefinition
INFO:  ... done
INFO:  Decompiling class com/strobel/assembler/metadata/MethodHandle
...

➜  fernflower-master ll out
total 1288
-rw-r--r--  1 darcy  staff   595K  5 16 17:47 decompiler.jar
➜  fernflower-master
Fernflower 在反编译 JAR 包时,默认反编译的结果也是一个 JAR 包。Jad
反编译速度
到这里已经介绍了五款 Java 反编译工具了,那么在日常开发中我们应该使用哪一个呢?又或者在代码分析时我们又该选择哪一个呢?我想这两种情况的不同,使用时的关注点也是不同的。如果是日常使用,读读代码,我想应该是对可读性要求更高些,如果是大量的代码分析工作,那么可能反编
相关推荐


0评论