Java excel数据导入mysql的实现示例详解
今天教大家如何使用Java将excel数据导入MySQL,文中有非常详细的代码示例,对正在学习java的小伙伴呢很有帮助,需要的朋友可以参考下
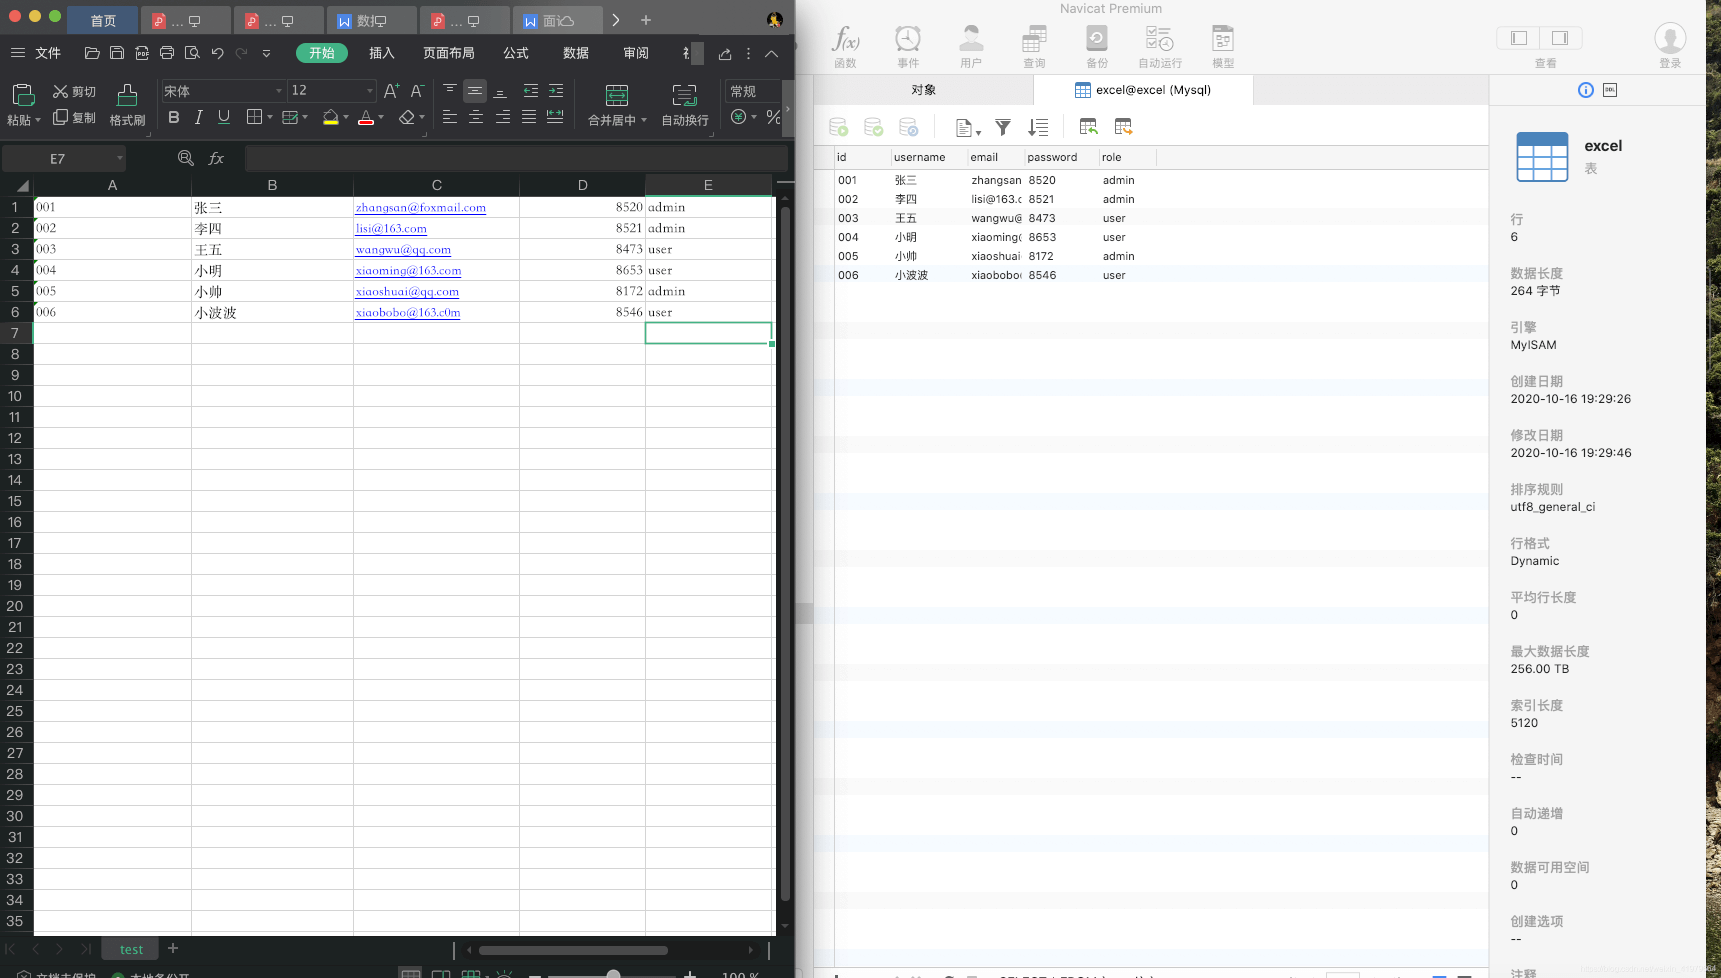
一.新建Excel表并插入测试所需数据

二.新建springBoot工程
修改pom.xml文件以及application.properties。
pom.xml
<!--缺少此jar包,导致@Mapper注解无效-->
<dependency>
    <groupId>org.mybatis.spring.boot</groupId>
    <artifactId>mybatis-spring-boot-starter</artifactId>
    <version>2.1.1</version>
</dependency>
<!--java对象状态自动映射到关系数据库中数据上-->
<dependency>
    <groupId>org.springframework</groupId>
    <artifactId>spring-orm</artifactId>
    <version>5.0.2.RELEASE</version>
</dependency>
<!--实现类与xml之间的相互转换-->
<dependency>
    <groupId>org.springframework</groupId>
    <artifactId>spring-oxm</artifactId>
    <version>5.0.2.RELEASE</version>
</dependency>
<dependency>
    <groupId>org.hibernate</groupId>
    <artifactId>hibernate-core</artifactId>
    <version>5.2.12.Final</version>
</dependency>
<dependency>
    <groupId>org.hibernate</groupId>
    <artifactId>hibernate-jpamodelgen</artifactId>
    <version>5.2.12.Final</version>
</dependency>
<dependency>
    <groupId>org.springframework.data</groupId>
    <artifactId>spring-data-jpa</artifactId>
    <version>2.2.3.RELEASE</version>
</dependency>
<dependency>
    <groupId>org.springframework.boot</groupId>
    <artifactId>spring-boot-starter-web</artifactId>
</dependency>
<dependency>
    <groupId>org.springframework.boot</groupId>
    <artifactId>spring-boot-starter-thymeleaf</artifactId>
</dependency>
<dependency>
    <groupId>mysql</groupId>
    <artifactId>mysql-connector-java</artifactId>
    <version>8.0.12</version>
</dependency>
<dependency>
    <groupId>org.apache.poi</groupId>
    <artifactId>poi</artifactId>
    <version>3.17</version>
</dependency>
<dependency>
    <groupId>org.apache.poi</groupId>
    <artifactId>poi-ooxml</artifactId>
    <version>3.17</version>
</dependency>
application.properties
spring.datasource.driver-class-name=com.mysql.cj.jdbc.Driver
spring.datasource.username=root
spring.datasource.password=12345678
spring.datasource.url=jdbc:mysql://localhost:3306/excel?useUnicode=true&useSSL=false&characterEncoding=UTF-8&serverTimezone=UTC
#配置通过jpa自动创建表
spring.jpa.hibernate.ddl-auto=create
#打印SQL
spring.jpa.show-sql=true
三.创建实体类进行关系的映射
启动项目就会在数据库自动创建实体类的表,创建完之后会仔细发现数据库里的字段和实体类里的字段顺序是不一样,会出现乱序状态,这是因为hibernate源码中用的是TreeMap存储实体类字段,TreeMap属性是无序的。具体的解决办法如下:
1.找到源码文件
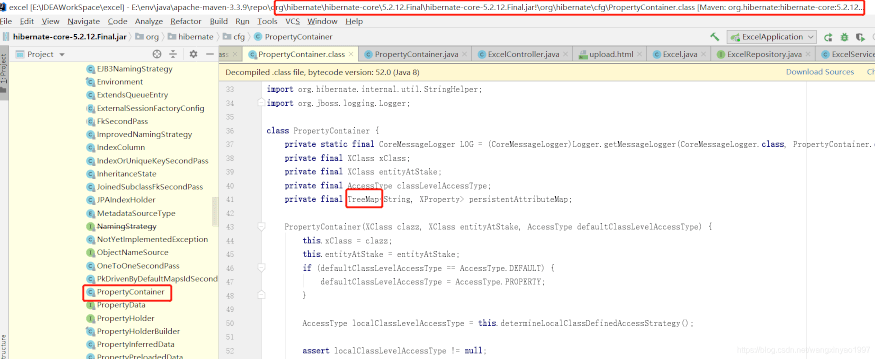
2.在当前项目中创建一个和源码类一样的包结构和一样名字的类,直接复制源码文件所有代码到新建的类中。
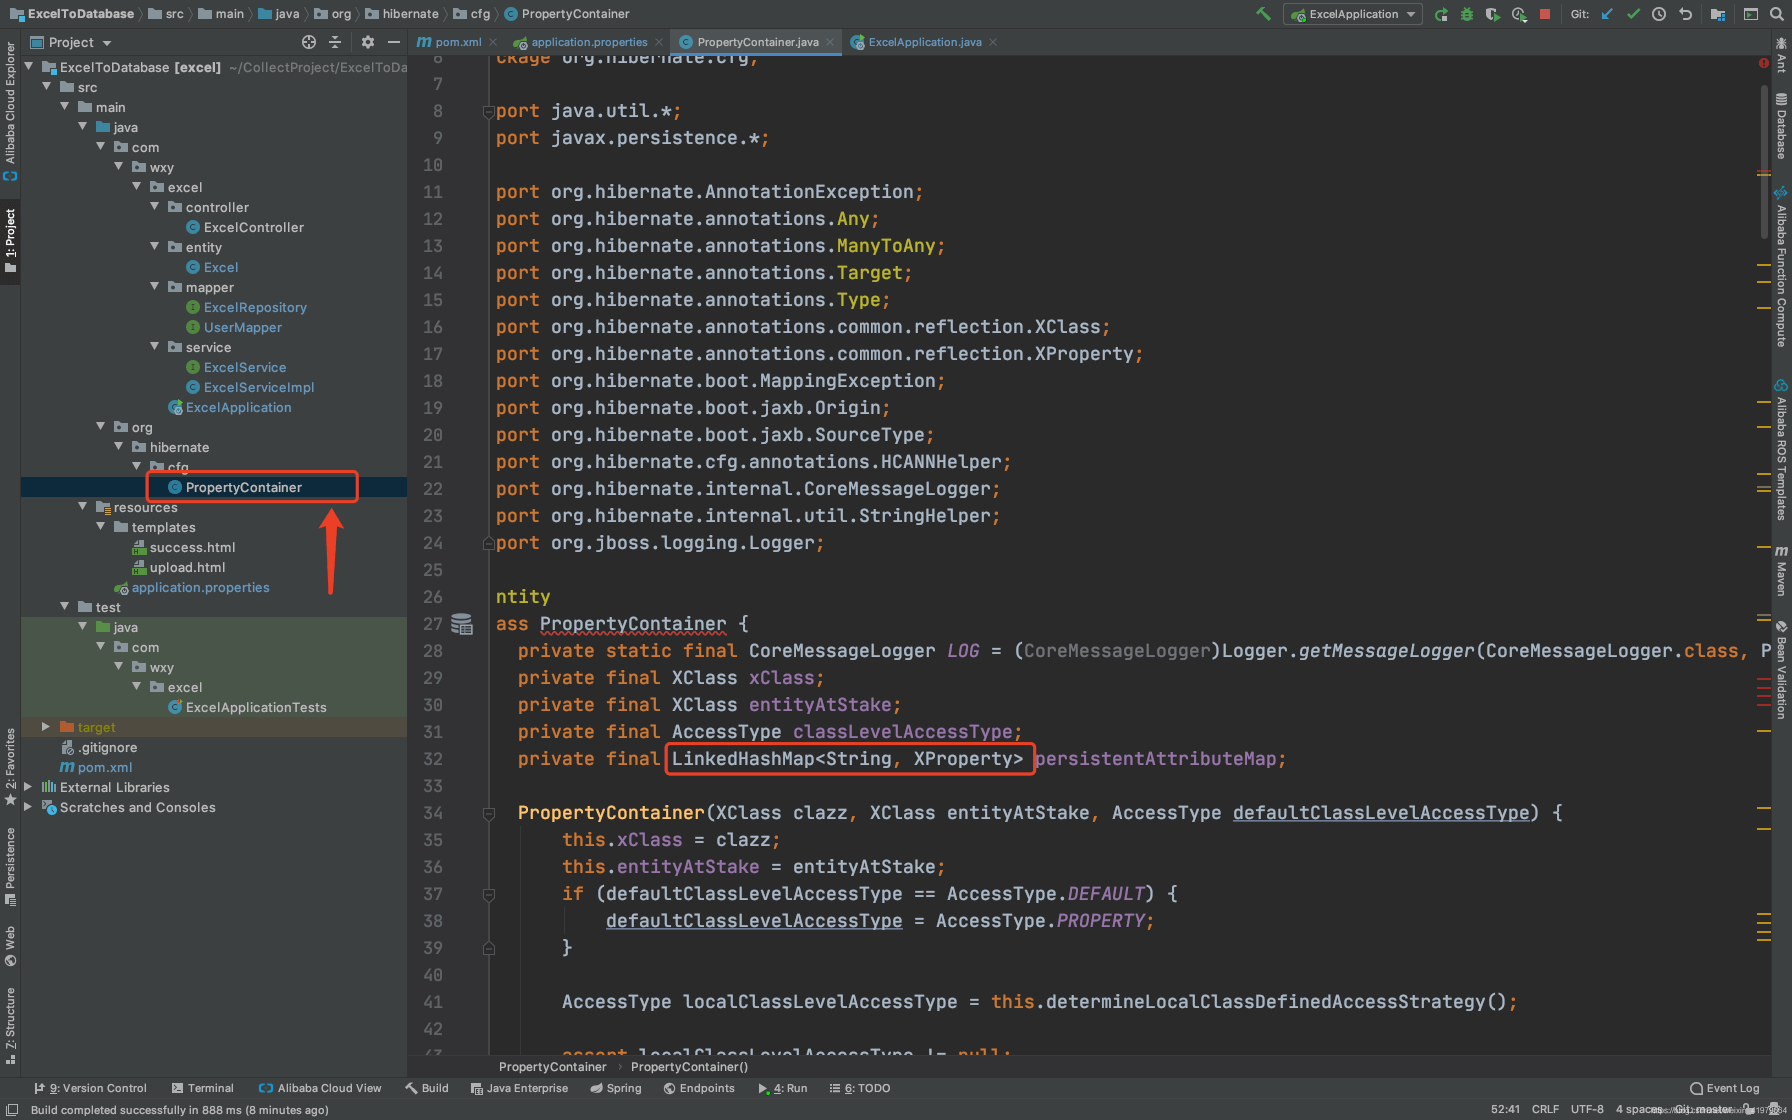
3.将上图标识的TreeMap 修改为LinkedHashMap修改好之后重新启动项目,会发现实体类和数据库表中顺序对齐了。

4.Excel的DAO类接口,与Excel有关的持久化操作方法。

5.创建service层接口,与Excel有关的业务逻辑方法。

6.service层方法的实现,与用户信息有关的业务逻辑方法。详细代码如下:
package com.wxy.excel.service;
import com.wxy.excel.mapper.ExcelRepository;
import com.wxy.excel.entity.Excel;
import com.wxy.excel.mapper.UserMapper;
import org.apache.poi.hssf.usermodel.*;
import org.apache.poi.ss.usermodel.*;
import org.springframework.beans.factory.annotation.Autowired;
import org.springframework.stereotype.Service;
import org.springframework.web.multipart.MultipartFile;
import org.apache.poi.hssf.usermodel.HSSFCellStyle;
import javax.servlet.http.HttpServletResponse;
import java.io.IOException;
import java.io.OutputStream;
import java.text.SimpleDateFormat;
import java.util.ArrayList;
import java.util.Date;
import java.util.List;
@Service
public class ExcelServiceImpl implements ExcelService{
@Autowired
private ExcelRepository excelRepository;
@Autowired
private UserMapper userMapper;
@Override
public boolean getExcel(MultipartFile file) throws Exception {
List<Excel> list = new ArrayList<Excel>();
//1.得到上传的表
Workbook workbook2 = WorkbookFactory.create(file.getInputStream());
//2.获取test工作表 注意test就是excel下面的sheet名称
Sheet sheet2 = workbook2.getSheet("test");
//3.获取表的总行数
int num = sheet2.getLastRowNum();
//4.获取表总列数
int col = sheet2.getRow(0).getLastCellNum();
//5.遍历excel每一行
for (int j = 0; j <num; j++) {
Row row1 = sheet2.getRow(j);
// 如果单元格中有数字或者其他格式的数据,则调用setCellType()转换为string类型
Cell cell1 = row1.getCell(0);
cell1.setCellType(CellType.STRING);
//获取表中第i行,第2列的单元格
Cell cell2 = row1.getCell(1);
cell2.setCellType(CellType.STRING);
//获取excel表的第i行,第3列的单元格
Cell cell3 = row1.getCell(2);
cell3.setCellType(CellType.STRING);
Cell cell4 = row1.getCell(3);
cell4.setCellType(CellType.STRING);
Cell cell5 = row1.getCell(4);
cell5.setCellType(CellType.STRING);
//这里new 一个对象,用来装填从页面上传的Excel数据,字段根据上传的excel决定
Excel excel= new Excel();
excel.setId(cell1.getStringCellValue());
excel.setUsername(cell2.getStringCellValue());
excel.setEmail(cell3.getStringCellValue());
excel.setPassword(cell4.getStringCellValue());
excel.setRole(cell5.getStringCellValue());
list.add(excel);
System.out.println("excel"+excel);
}
excelRepository.saveAll(list);
return true;
}
@Override
public void exportExcel(HttpServletResponse response) throws IOException {
// 第一步,创建一个webbook,对应一个Excel文件
HSSFWorkbook wb = new HSSFWorkbook();
// 第二步,在webbook中添加一个sheet,对应Excel文件中的sheet
HSSFSheet sheet = wb.createSheet("test");
// 第三步,在sheet中添加表头第0行,注意老版本poi对Excel的行数列数有限制short
HSSFRow row = sheet.createRow(0);
// 第四步,创建单元格,并设置值表头 设置表头居中
HSSFCellStyle style = wb.createCellStyle();
// 创建一个居中格式
style.setAlignment(HorizontalAlignment.CENTER);
/*此处根据情况自己自定义样式*/
HSSFCell cell = row.createCell(0);
cell.setCellValue("ID");
cell.setCellStyle(style);
cell = row.createCell(1);
cell.setCellValue("姓名");
cell.setCellStyle(style);
cell = row.createCell(2);
cell.setCellValue("邮箱");
cell.setCellStyle(style);
cell = row.createCell(3);
cell.setCellValue("密码");
cell.setCellStyle(style);
cell = row.createCell(4);
cell.setCellValue("角色");
cell.setCellStyle(style);
// 第五步,写入实体数据 实际应用中这些数据从数据库得到,
List<Excel> list = userMapper.getAllUser();
for (int i = 0; i < list.size(); i++) {
row = sheet.createRow(i + 1);
Excel excel = list.get(i);
// 创建单元格,并设置值
row.createCell(0).setCellValue(excel.getId());
row.createCell(1).setCellValue(excel.getUsername());
row.createCell(2).setCellValue(excel.getEmail());
row.createCell(3).setCellValue(excel.getPassword());
row.createCell(4).setCellValue(excel.getRole());
}
//第六步,输出Excel文件
OutputStream output = response.getOutputStream();
response.reset();
//设置日期格式
SimpleDateFormat df = new SimpleDateFormat("yyyyMMddHHmmss");
// 获取当前系统时间
String fileName = df.format(new Date());
//设置导出文件表头(即文件名)
response.setHeader("Content-disposition", "attachment; filename=" + fileName + ".xls");
//设置返回内容类型
response.setContentType("application/msexcel");
wb.write(output);
output.close();
}
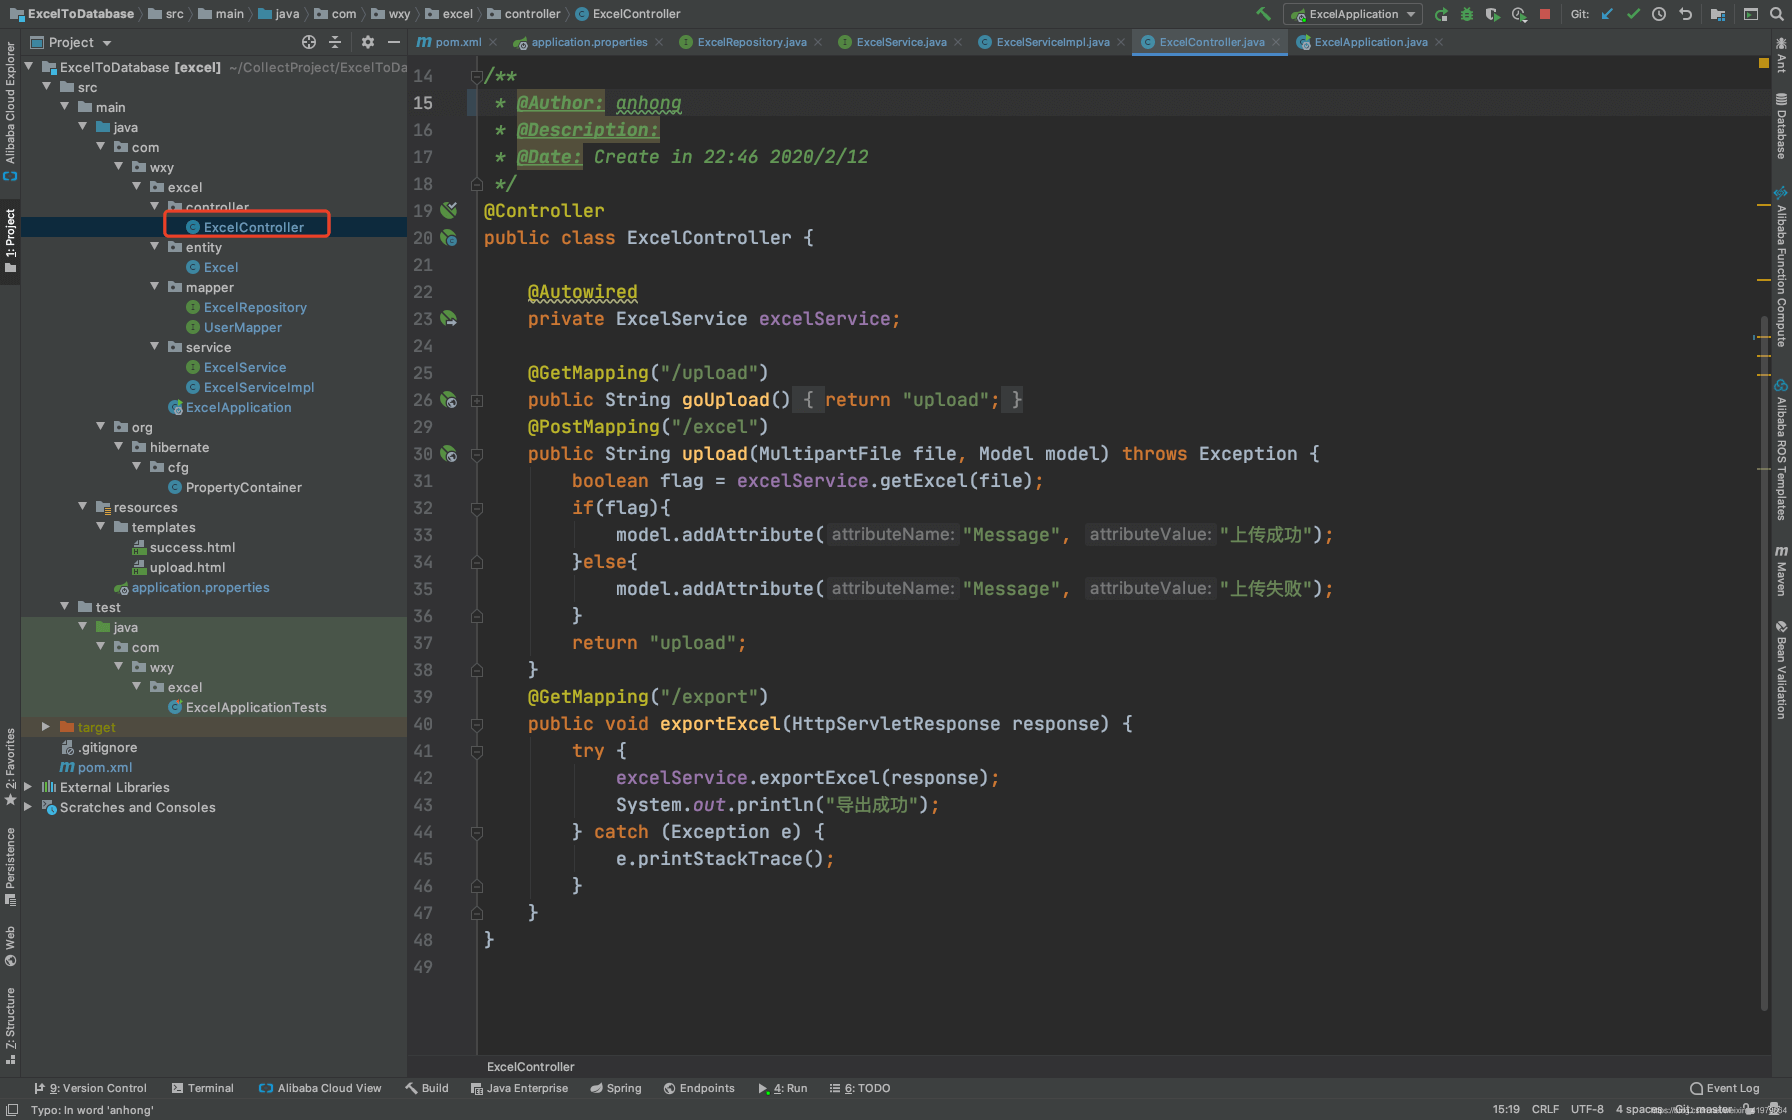
}7.Controller层实现。
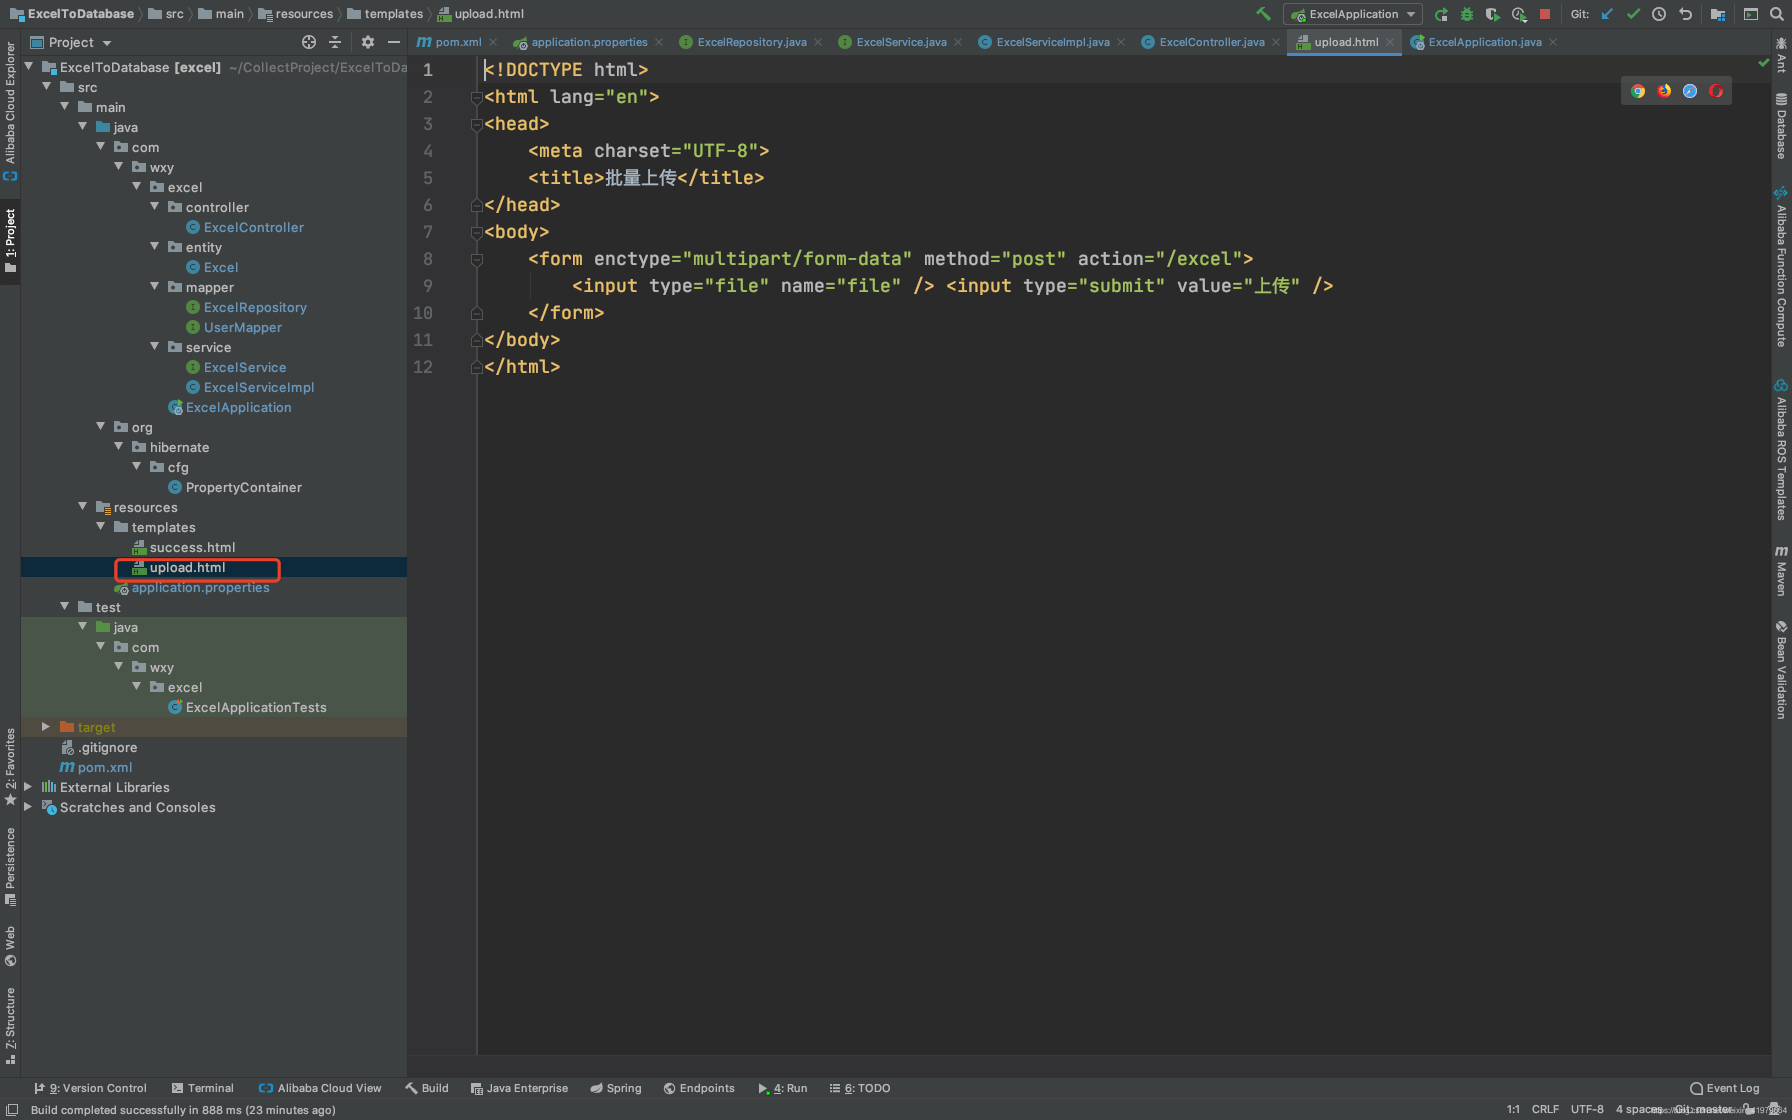
8.前端html实现.
9.最终把excel数据导入到mysql数据库的效果如下:
到此这篇关于Java excel数据导入mysql的实现示例详解的文章就介绍到这了
相关推荐
PHP实现部分字符隐藏
 沙雕mars · 1324浏览 · 2019-04-28 09:47:56
Java中ArrayList和LinkedList区别
kenrry1992 · 907浏览 · 2019-05-08 21:14:54
5月语言排行榜:R 跌出前二十,Python 紧咬 C++
manongba · 686浏览 · 2019-05-09 17:27:24
Tomcat 下载及安装配置
manongba · 967浏览 · 2019-05-13 21:03:56
什么是SpringBoot
iamitnan · 1086浏览 · 2019-05-14 22:20:36
分类专栏
最新发布

最热排行

0评论