JIRA是Atlassian公司出品的项目与事务跟踪工具,被广泛应用于缺陷跟踪、客户服务、需求收集、流程审批、任务跟踪、项目跟踪和敏捷管理等工作领域。
一. Jira简介
中文官网:https://www.atlassian.com/zh/software/jira

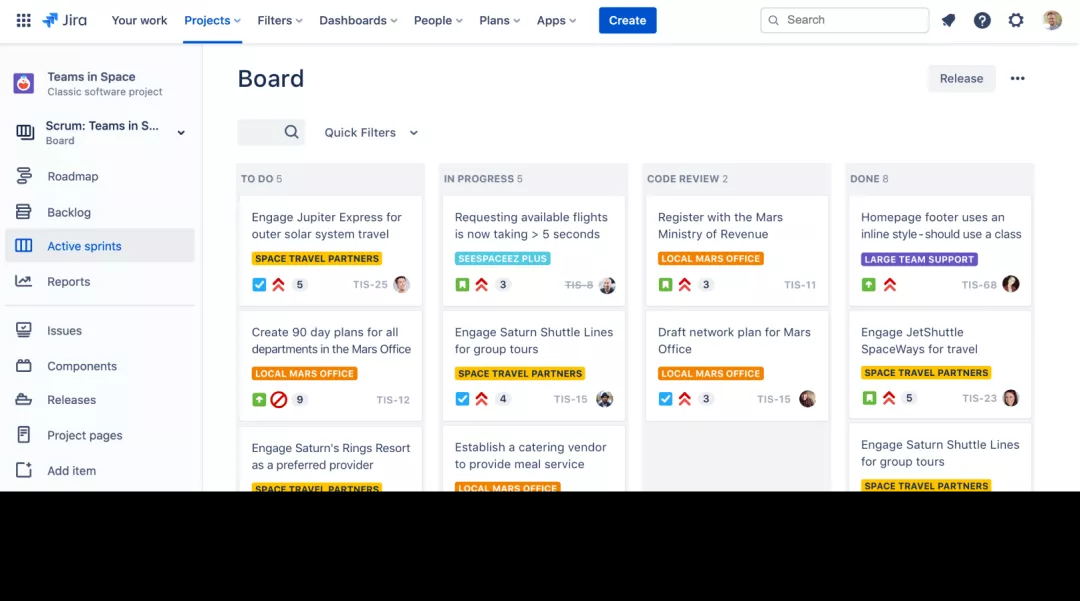
1.1 Jira可以做什么?
规划
创建项目,用户需求和事务、规划 Sprint 并跨团队分配开发任务。
跟踪
全面了解项目进度情况,安排整个团队工作的优先级排序并进行讨论。
二. 安装部署
2.1 数据中心版本
https://www.atlassian.com/zh/software/jira/pricing?tab=data-center 试用

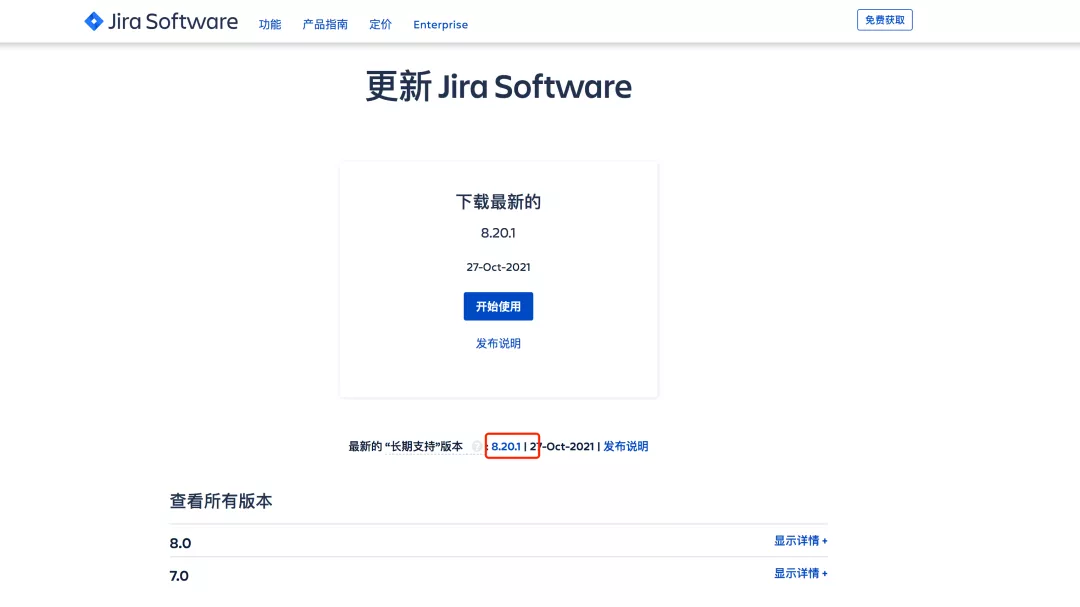
选择历史版本下载:

下载最新的LTS 长期支持版本
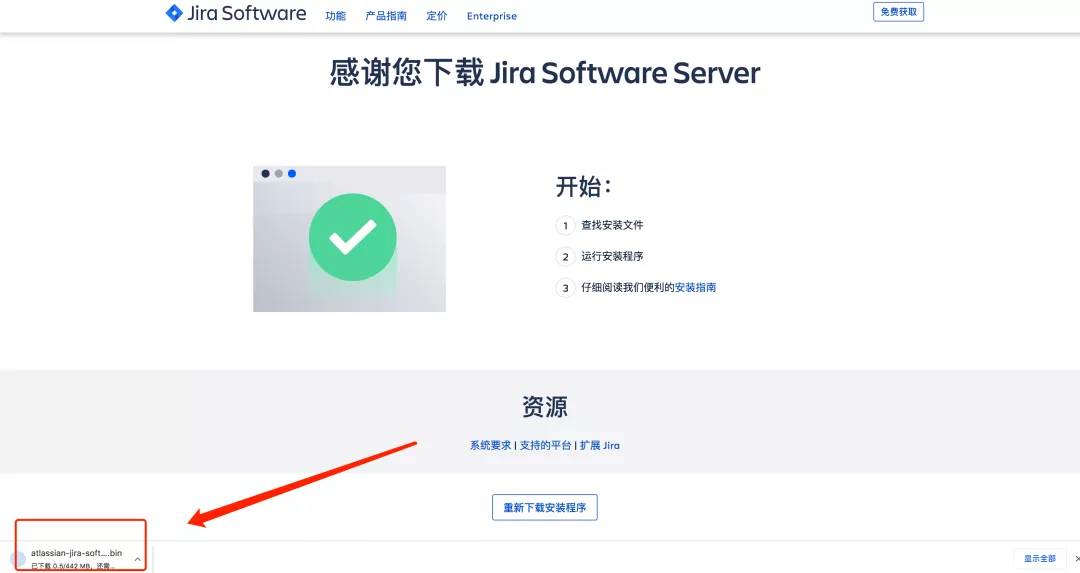
选择部署的环境:

开始下载Jira Software Server安装程序:
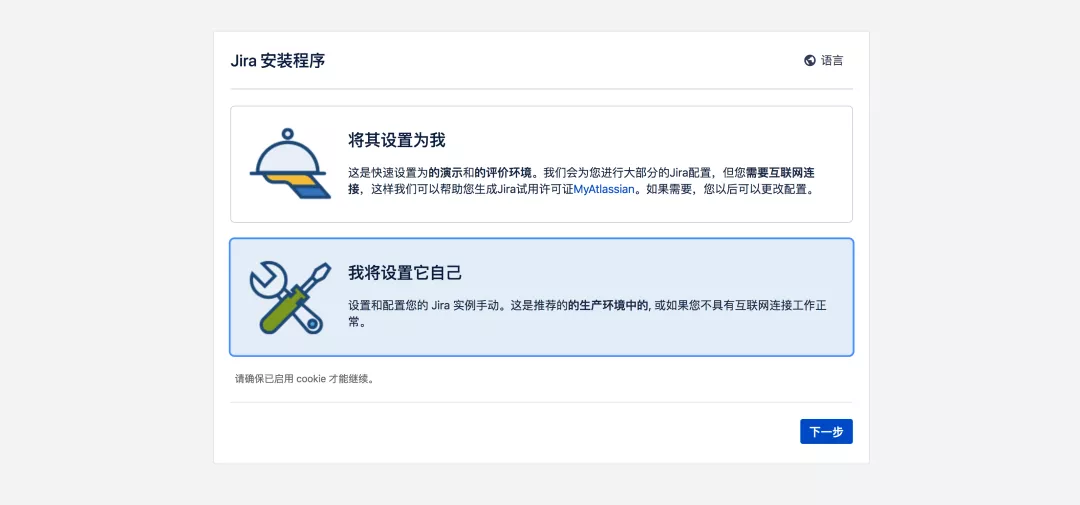
2.2 安装部署
scp atlassian-jira-software-8.20.1-x64.bin  root@192.168.1.200:/opt/

## 添加权限
[root@zeyang-nuc-service opt]# chmod +x atlassian-jira-software-8.20.1-x64.bin


## 运行安装程序
[root@zeyang-nuc-service opt]# ./atlassian-jira-software-8.20.1-x64.bin
Unpacking JRE ...
Starting Installer ...

This will install Jira Software 8.20.1 on your computer.
OK [o, Enter], Cancel [c]      ## 回车

Click Next to continue, or Cancel to exit Setup.

Choose the appropriate installation or upgrade option.
Please choose one of the following:
Express Install (use default settings) [1], Custom Install (recommended for advanced users) [2, Enter], Upgrade an existing Jira installation [3]

## 此处选择自定义安装,  输入回车

Select the folder where you would like Jira Software to be installed.
Where should Jira Software be installed?
[/opt/atlassian/jira]

## 选择安装目录


Default location for Jira Software data
[/var/atlassian/application-data/jira]

## 选择数据目录

Configure which ports Jira Software will use.
Jira requires two TCP ports that are not being used by any other
applications on this machine. The HTTP port is where you will access Jira
through your browser. The Control port is used to startup and shutdown Jira.
Use default ports (HTTP: 8080, Control: 8005) - Recommended [1, Enter], Set custom value for HTTP and Control ports [2]
2   ## 输入2  自定义服务端口
HTTP Port Number
[8071]
8801
Control Port Number
[8077]
8802

## 安装服务
Jira can be run in the background.
You may choose to run Jira as a service, which means it will start
automatically whenever the computer restarts.
Install Jira as Service?
Yes [y, Enter], No [n]
y


Details on where Jira Software will be installed and the settings that will be used.
Installation Directory: /opt/atlassian/jira
Home Directory: /var/atlassian/application-data/jira
HTTP Port: 8801
RMI Port: 8802
Install as service: Yes
Install [i, Enter], Exit [e]


Extracting files ...


## 启动服务
Please wait a few moments while Jira Software is configured.

Installation of Jira Software 8.20.1 is complete
Start Jira Software 8.20.1 now?
Yes [y, Enter], No [n]
y

Please wait a few moments while Jira Software starts up.
Launching Jira Software ...


Installation of Jira Software 8.20.1 is complete
Your installation of Jira Software 8.20.1 is now ready and can be accessed
via your browser.
Jira Software 8.20.1 can be accessed at http://localhost:8801
Finishing installation ...
访问:http://serverip:8801
2.3 初始化配置
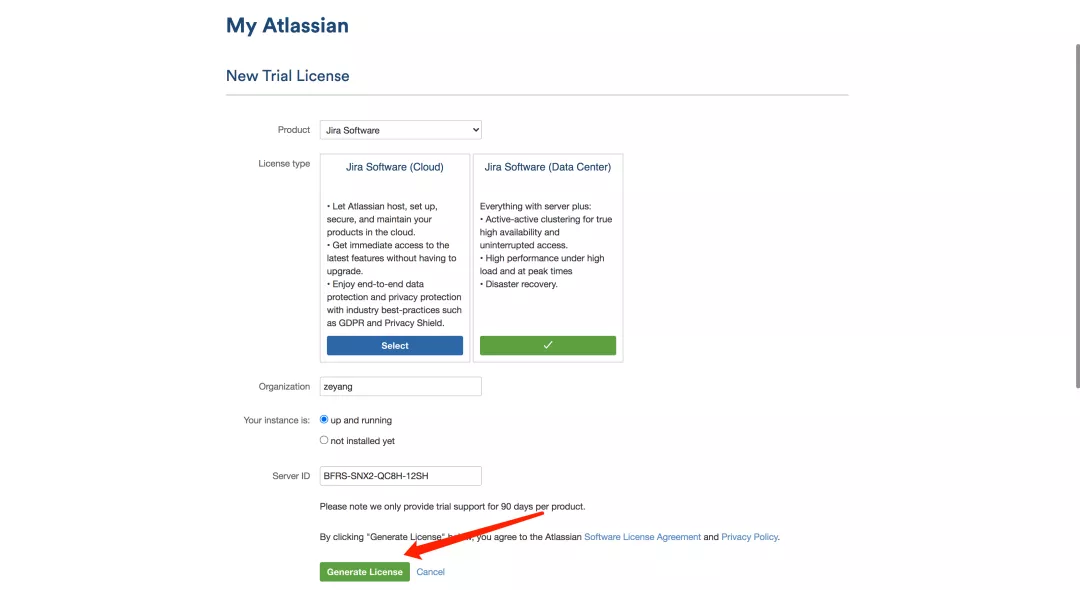
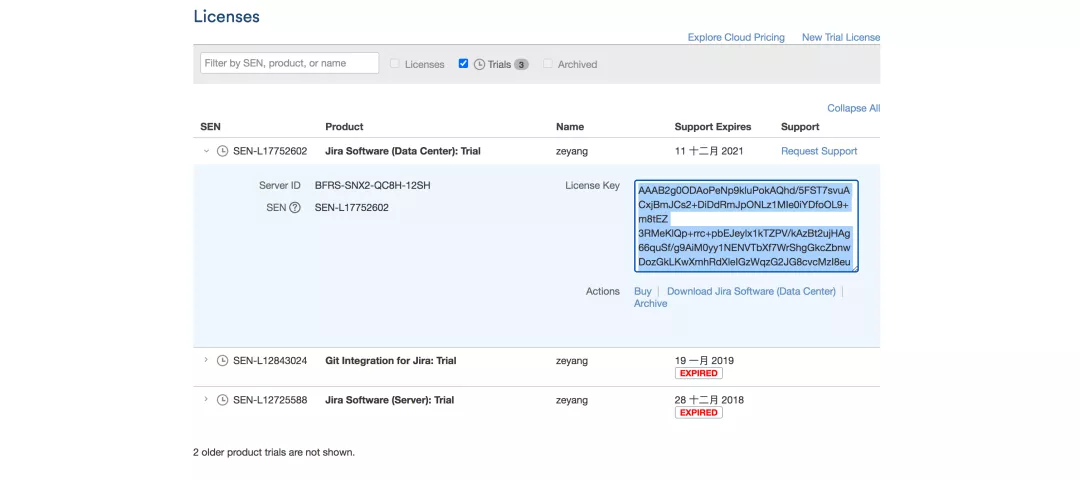
获取授权码:
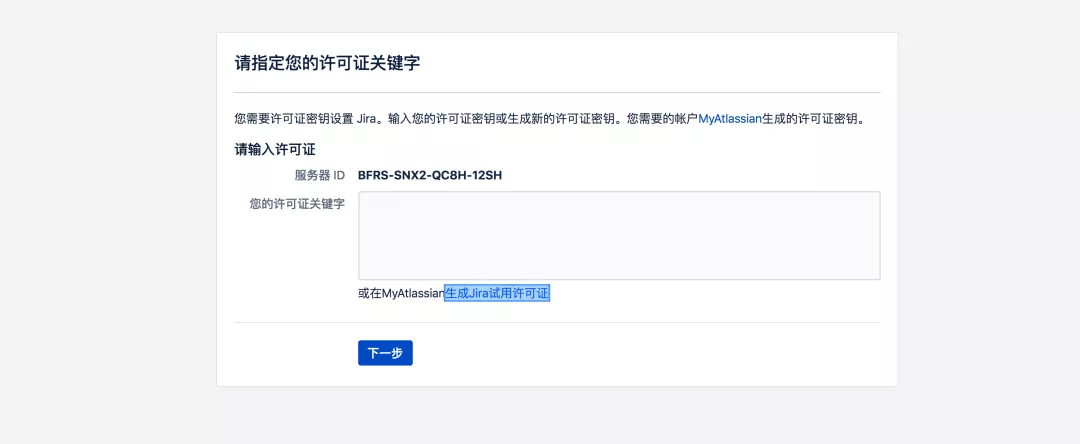
注册账号登录:生成授权码,激活实例;
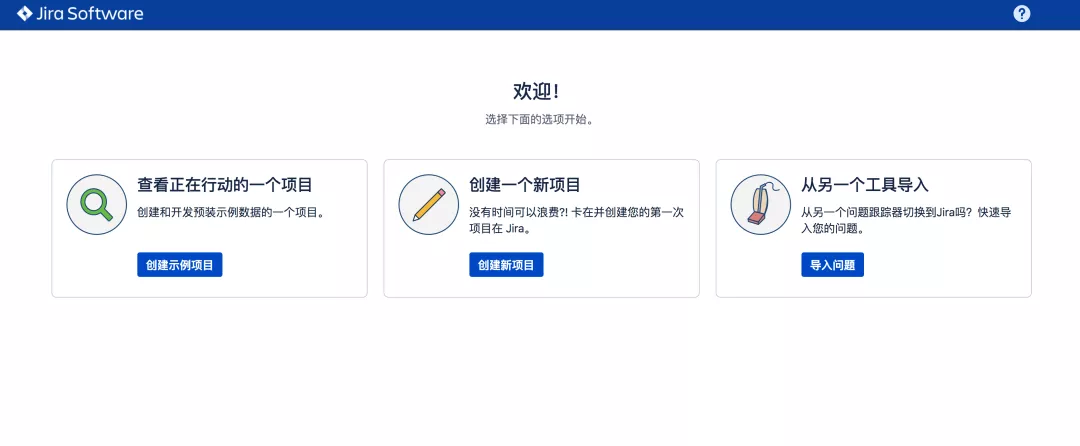
三. Jira使用实践
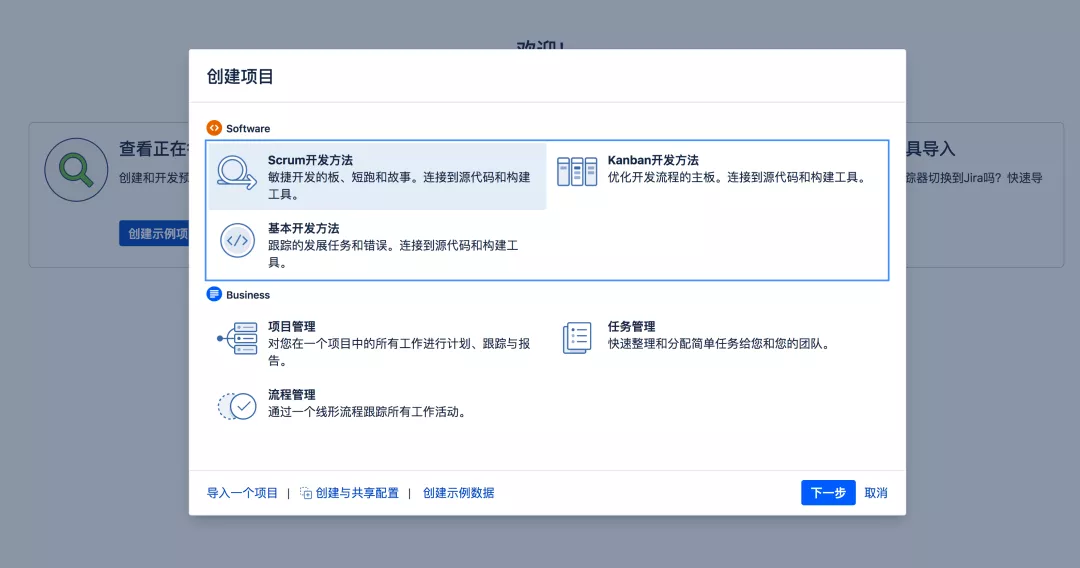
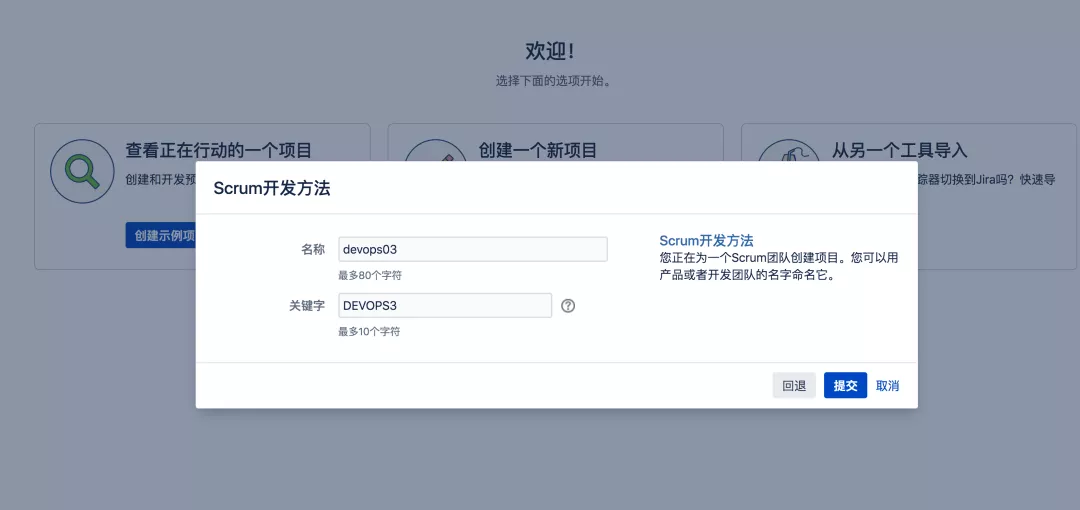
3.1 创建一个项目
注意:一个Jira 项目对应一个GitLab项目组;
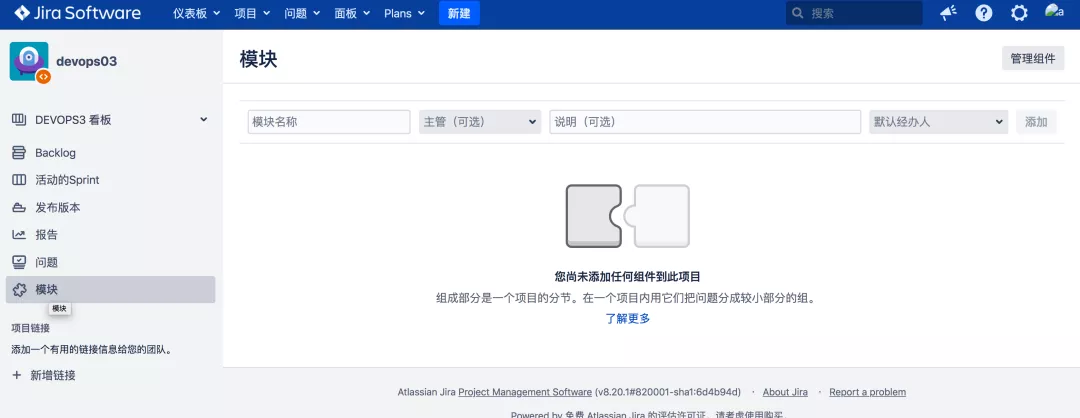
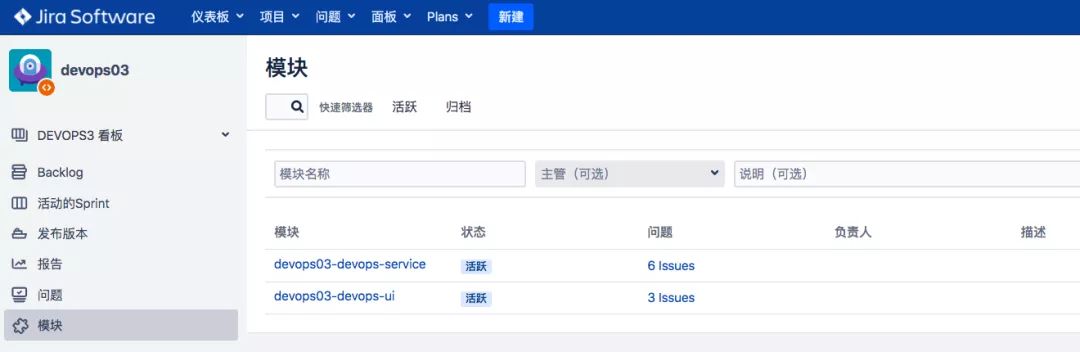
3.2 为项目添加模块
注意:一个Jira模块对应一个GitLab项目;

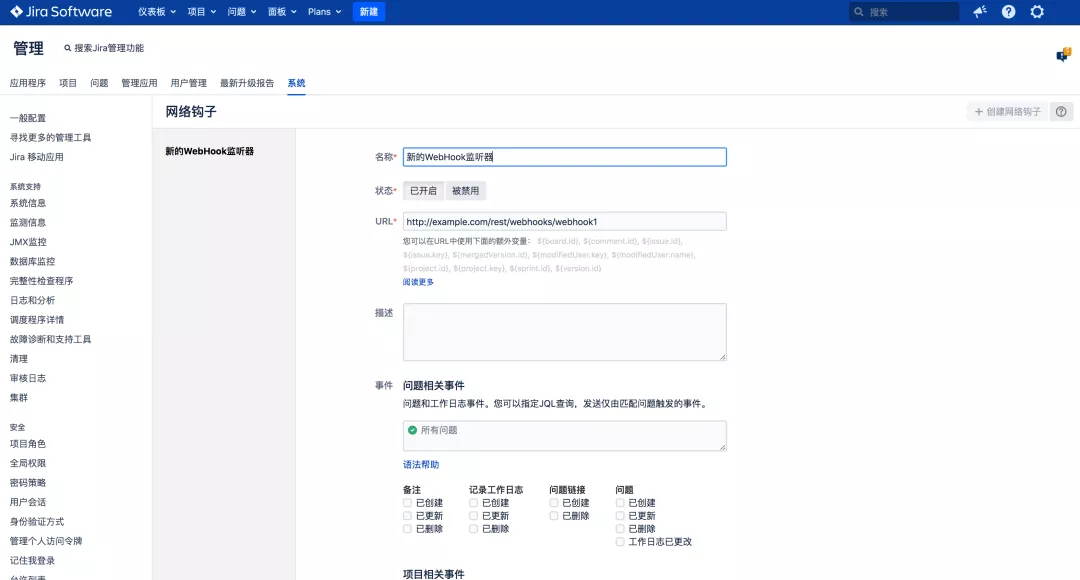
3.3 配置WebHook系统, 网络钩子(webhook)
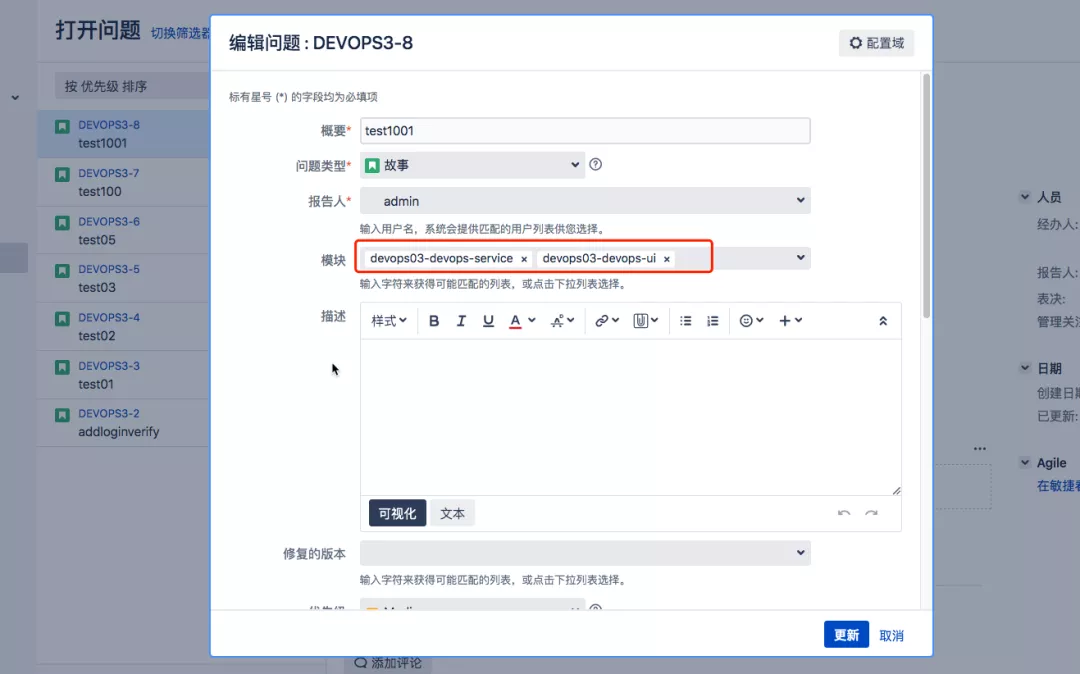
3.4 需求/任务管理
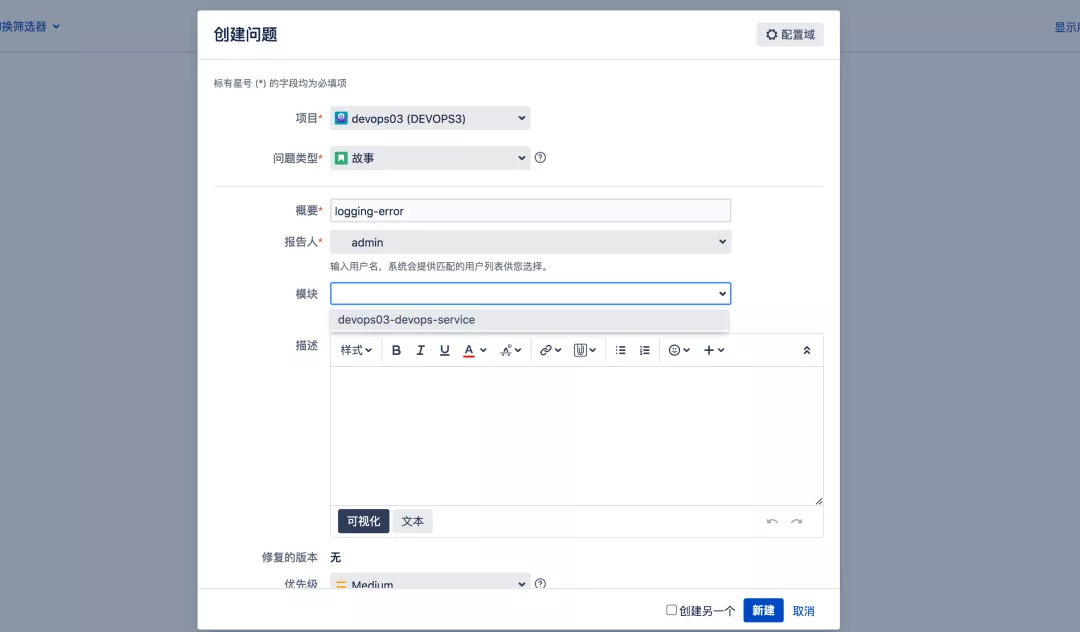
创建需求
这里在Jira上面把这个需求logging-error, 类型为故事 关联到devops03-devops-service模块;
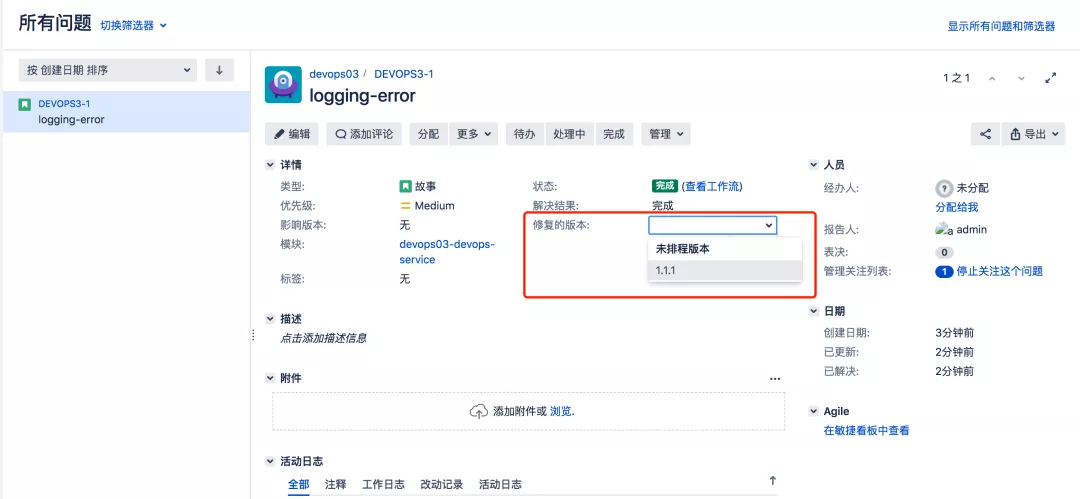
3.5 发布Release
课程中把 发布对应为GitLab项目代码库中的版本分支;

issue关联发布:可以想象成GitLab特性分支合并到版本分支;
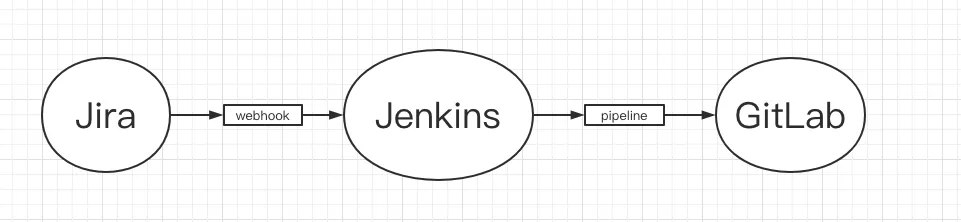
四. Jira自动化实践
工作流

工具链集成
4.1 需求与代码关联

1. 创建Jenkins作业并配置webhook
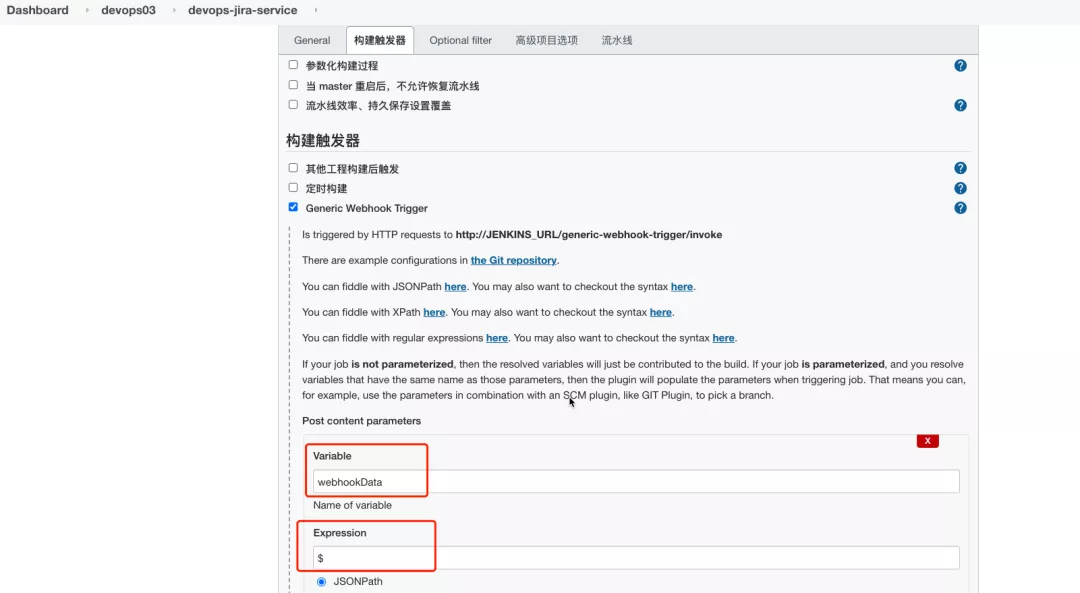
webhookData:这个变量存放的是Jira 传递的数据。
2. 为Jira配置一个系统级别的webhook
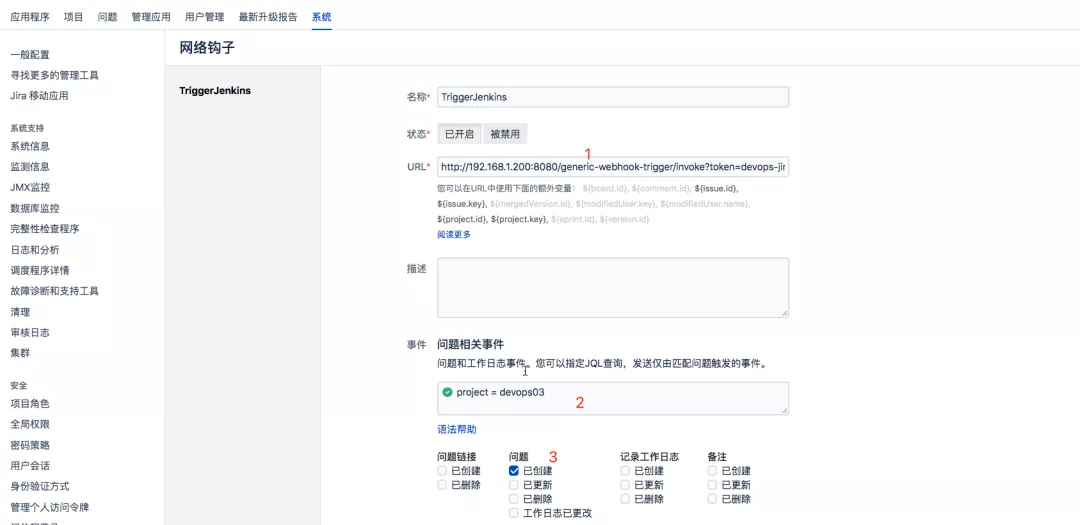
选项解释:
指定Jenkins的webhook触发器地址;
通过JQL指定,允许devops03这个项目进行触发;
勾选动作,触发事件;(我在jira做了什么操作之后能够触发)
3. Jenkins流水线配置
解析Jira传递过来的数据;
webhookData = readJSON text: "${webhookData}"


// Jira事件
jiraEvent = webhookData.webhookEvent
jiraProjectName = webhookData.issue.fields.project.name

// 获取gitlab参数
gitlabProjects = []
gitlabBranchName = webhookData.issue.key
gitlabGroupName = jiraProjectName

for (i in webhookData.issue.fields.components){
    gitlabProjects.add(i["name"])
}

currentBuild.description = "Trigger by ${jiraEvent} \n project: ${gitlabProjects} \n branch: ${gitlabBranchName}"
封装GitLab API接口
https://docs.gitlab.com/ee/api/branches.html#create-repository-branch
// 创建分支
def CreateBranch(projectId, newBranchName, sourceBranchName){
    try {
        apiUrl = "projects/${projectId}/repository/branches?branch=${newBranchName}&ref=${sourceBranchName}"
        response = HttpReq('POST', apiUrl, "")
    }
    catch(Exception e) {
        println(e)

    }
}

// 获取所有项目的id
def GetProjectsId(gitlabGroupName, gitlabProjects){
    gitlabProjectIds = []
    for (project in gitlabProjects){
        id = GetProjectId(gitlabGroupName, project)
        println(id)
        if (id != 0){
            gitlabProjectIds.add(id)
        }
    }
    return gitlabProjectIds
}

// 根据项目名称获取项目id
def GetProjectId(groupName, projectName){
    apiUrl = "projects?search=${projectName}"
    response = HttpReq('GET', apiUrl, "")
    response = readJSON text: response.content - "\n"

    if (response.size() > 1){
        for (i in response){
            println(i["path_with_namespace"])
            println(groupName + projectName)
            if (i["path_with_namespace"] == "${groupName}/${projectName}"){
                println(i["id"])
                return i["id"]
            }
        }
    } else {
        return response[0]["id"]
    }
}


// 封装HTTP
def HttpReq(reqType, reqUrl,reqBody ){
    def gitServer = "http://192.168.1.200/api/v4"
    withCredentials([string(credentialsId: '058b7907-ebe2-4d14-9b91-1ac72e071c59', variable: 'GITLABTOKEN')]) {
        response = httpRequest acceptType: 'APPLICATION_JSON_UTF8',
                          consoleLogResponseBody: true,
                          contentType: 'APPLICATION_JSON_UTF8',
                          customHeaders: [[maskValue: false, name: 'PRIVATE-TOKEN', value: "${GITLABTOKEN}"]],
                          httpMode: "${reqType}",
                          url: "${gitServer}/${reqUrl}",
                          wrapAsMultipart: false,
                          requestBody: "${reqBody}"

    }
    return response
}
Pipeline主程序
pipeline {
agent { label "build" }
stages{
stage("Process"){
steps{
script{
println(gitlabProjects)
println(gitlabBranchName)
projectIds = GetProjectsId(gitlabGroupName, gitlabProjects)
switch(jiraEvent) {
case "jira:issue_created":
println(projectIds)
for (id in projectIds){
CreateBranch(id, gitlabBranchName, "master")
}
break
default:
println("error...")
break
}
}
}
}
}
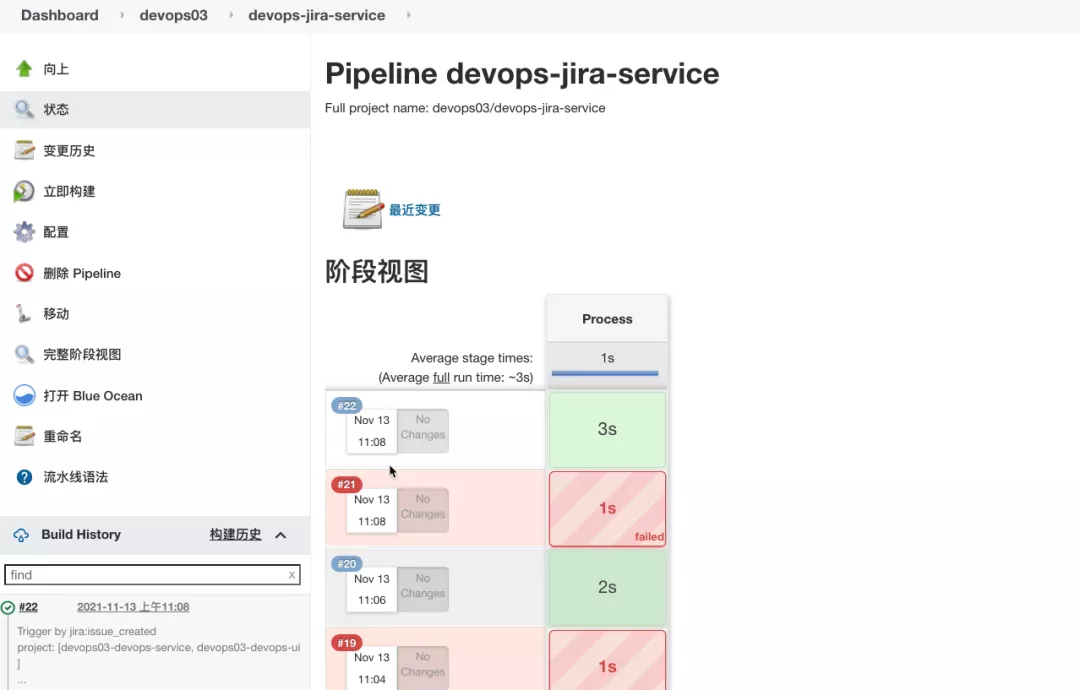
}4. 效果验证
在Jira里面创建一个模块和issue, 关联 项目;
Jenkins 流水线运行;
相关推荐


0评论