nginx实现多geoserver服务的负载均衡的示例代码
本文主要介绍了nginx实现多geoserver服务的负载均衡的示例代码,文中通过示例代码介绍的非常详细,对大家的学习或者工作具有一定的参考学习价值,需要的朋友们下面随着小编来一起学习学习吧
概述
为了提高服务的访问速度,减轻geoserver服务的压力,同时避免服务节点出现问题而影响服务访问的稳定性,我们通常会通过部署多个geoserver来解决,但是部署了多个geoserver后,我们需要一个统一的接口提供出来供使用,nginx很好地可以这样的需求,本文讲讲如何通过nginx实现多geoserver服务的负载均衡。
实现效果
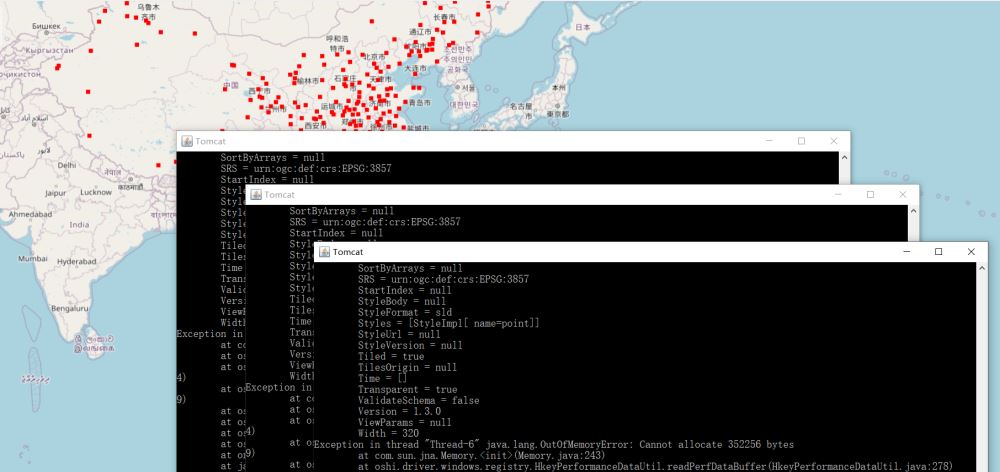
编辑
实现
1. 多geoserver部署
为了保持geoserver的服务一致,我们先配置好一个geoserver服务,配置好之后将部署的Tomcat复制,克隆多个出来,本文为演示复制了两个(共三个geoserver),修改Tomcat的端口,使三个端口不冲突,复制好之后分别启动三个Tomcat。
2. nginx配置
修改nginx.conf文件,配置信息如下:
#user  nobody; worker_processes  1;
 #error_log  logs/error.log;
  #error_log  logs/error.log  notice;
   #error_log  logs/error.log  info;
    #pid        logs/nginx.pid;
     events {     worker_connections  1024;
      }
       http {     include       mime.types;
            default_type  application/octet-stream;
                 #log_format  main  '$remote_addr - $remote_user [$time_local] "$request" '
                 #                  '$status $body_bytes_sent "$http_referer" '
                 #                  '"$http_user_agent" "$http_x_forwarded_for"';
                 #access_log  logs/access.log  main;
                      sendfile        on;
                      #tcp_nopush     on;
                      #keepalive_timeout  0;
                      keepalive_timeout  65;
                      #gzip  on;
                      # 反向代理配置
                      upstream server_list{
                      # 这个是tomcat的访问路径
                      server localhost:8081;
                      server localhost:8082;
                      server localhost:8083;
                           }
                      server {
                               listen       80;
                               server_name  localhost;
                               location / {
                               add_header 'Access-Control-Allow-Origin' $http_origin;             add_header 'Access-Control-Allow-Credentials' 'true';             add_header 'Access-Control-Allow-Methods' 'GET, POST, OPTIONS';             add_header 'Access-Control-Allow-Headers' 'DNT,web-token,app-token,Authorization,Accept,Origin,Keep-Alive,User-Agent,X-Mx-ReqToken,X-Data-Type,X-Auth-Token,X-Requested-With,If-Modified-Since,Cache-Control,Content-Type,Range';             add_header 'Access-Control-Expose-Headers' 'Content-Length,Content-Range';             if ($request_method = 'OPTIONS') {                 add_header 'Access-Control-Max-Age' 1728000;                 add_header 'Content-Type' 'text/plain; charset=utf-8';                 add_header 'Content-Length' 0;                 return 204;             }             root   html;             proxy_pass http://server_list;             index  index.html index.htm;         }                  error_page   500 502 503 504  /50x.html;         location = /50x.html {             root   html;         }     } }
配置好nginx后,启动nginx。
3. 前端调用
根据上述的配置,nginx的端口为80,因此geoserver的地址为http://localhost/geoserver,在ol中的调用代码如下:
<!doctype html> <html> <head>
   <meta charset="UTF-8">
   <title>OpenLayers map preview</title>
    <link rel="stylesheet" href="lib/ol/ol.css" rel="external nofollow"  type="text/css">
     <link rel="stylesheet" href="css/common.css" rel="external nofollow" >
      <script src="../ol5/ol.js" type="text/javascript"></script>
       </head>
        <body>
         <div id="map"></div>
         <script>
         const options = {
         center: [52102781.07568731, 4456849.777083951],
            zoom: 3,
            minZoom: 0,
            maxZoom: 18
       }
         const base = new ol.layer.Tile({
            visible: true,
             source: new ol.source.OSM()
       });
         const wms = new ol.layer.Tile({
          source: new ol.source.TileWMS({
          url: 'http://localhost/geoserver/mapbox/wms',
           params: {'LAYERS': 'mapbox:city', 'TILED': true},
           serverType: 'geoserver',
           transition: 0
     })
     })   window.map = new ol.Map({
          controls: ol.control.defaults({
          attribution: false
          })
          .extend([new ol.control.ScaleLine()]),
          target: 'map',
          layers: [base, wms],
          view: new ol.View({
          center: options.center,
          zoom: options.zoom,
          minZoom: options.minZoom,
          maxZoom: options.maxZoom
          })
          });
          </script>
           </body>
            </html>
相关推荐
将Fedora 29升级到Fedora 30
 吴振华 · 704浏览 · 2019-05-14 22:00:02
有效避免数据丢失!Redis持久化方案选择详解
manongba · 921浏览 · 2019-05-15 10:58:03
使用Nginx反向代理到go-fastdfs
iamitnan · 726浏览 · 2019-05-23 13:42:00
利用VLC搭建组播流服务器
追忆似水年华 · 2693浏览 · 2019-06-14 11:27:06
如何设计一个优秀的分布式系统?重要因素、工具、策略都在这里
chenguangming9 · 712浏览 · 2019-06-18 11:00:10
用Bash脚本监控Linux上的内存使用情况
吴振华 · 974浏览 · 2019-06-24 11:27:02
分类专栏
最新发布

最热排行

0评论